Gotify 推送服务搭建指南
Gotify 是一个可自建的推送服务,支持官方客户端,保护用户隐私。
官网:Gotify
客户端:Gotify Android 客户端
在 VPS 中搭建 Gotify 服务
-
创建 Gotify 目录
mkdir gotify && cd gotify -
使用 Docker Compose 创建服务
创建docker-compose.yaml文件,内容如下:version: "3" services: gotify: image: gotify/server ports: - 8189:80 volumes: - "./gotify_data:/app/data" -
下载配置文件
wget -O config.yml https://raw.githubusercontent.com/gotify/server/master/config.example.yml -
启动服务
docker-compose up -d -
修改密码
默认账号和密码均为admin。如果安装后密码不正确,请按以下步骤修改:- 下载数据库文件:
/目录/gotify/gotify_data/gotify.db - 使用数据库工具打开
gotify.db,在users表中执行:UPDATE users SET pass = '$2a$10$16d9S6L.u9MMDqT8gHPW4ejR/l6yxPzsQ9256gE4VTLmaTQPdhDoC' WHERE id = 1; - 上传修改后的
gotify.db文件,使用admin登录。
- 下载数据库文件:
在 Nginx Proxy Manager 配置反向代理
-
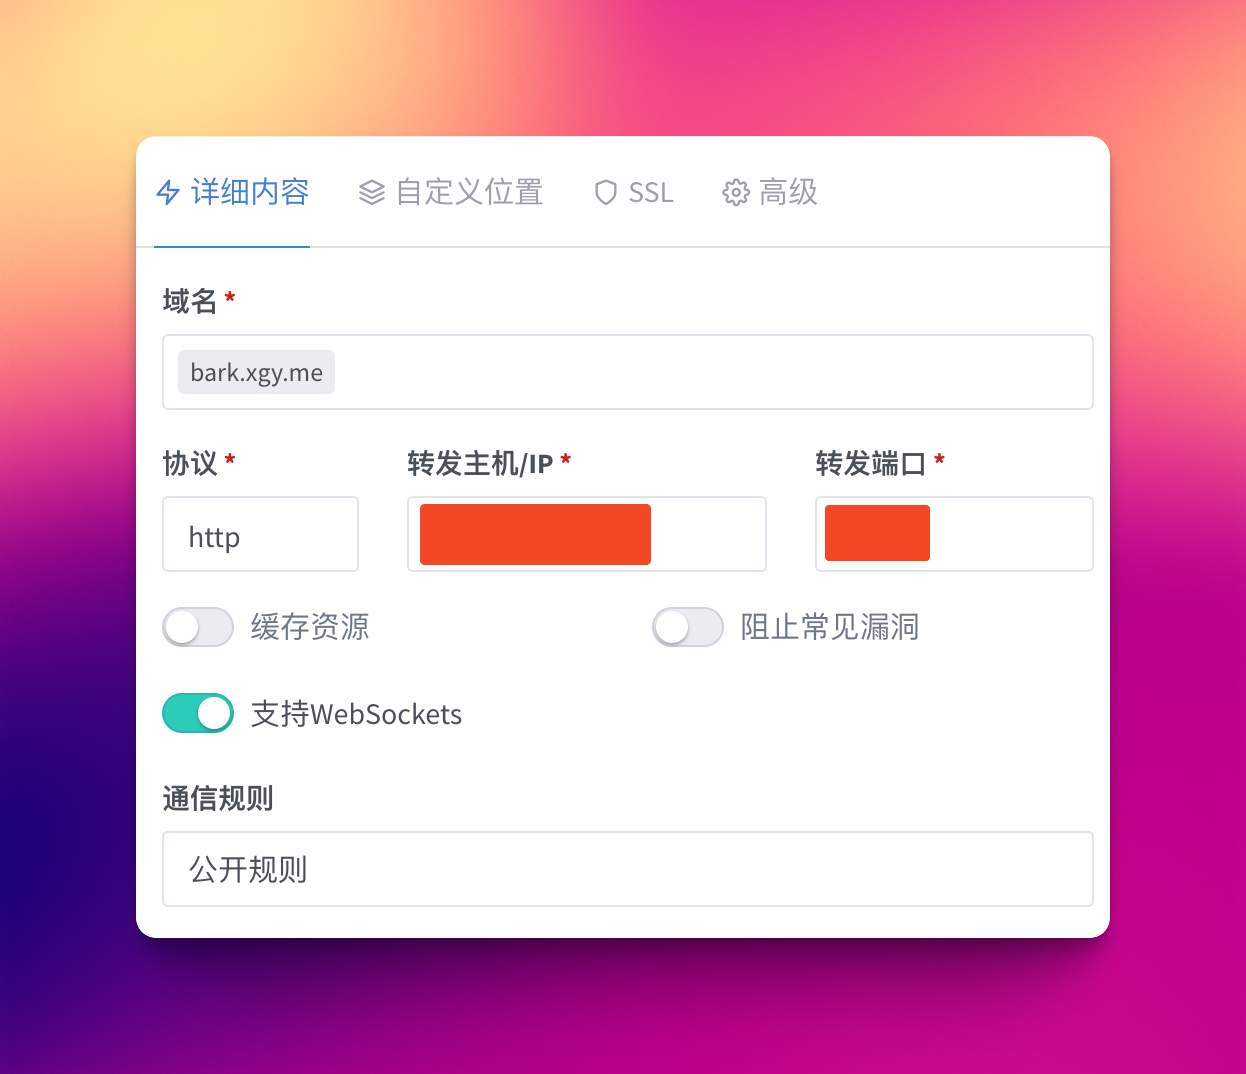
创建代理服务,勾选“支持 WebSocket”。

-
自定义 Nginx 配置:
proxy_set_header Upgrade $http_upgrade; proxy_set_header Connection "upgrade"; proxy_set_header X-Real-IP $remote_addr; proxy_set_header X-Forwarded-For $proxy_add_x_forwarded_for; proxy_set_header X-Forwarded-Proto http; proxy_redirect http:// $scheme://; # 保留主机头以验证 WebSocket 连接 proxy_set_header Host $http_host; # 设置超时以保持 WebSocket 活跃 proxy_connect_timeout 1m; proxy_send_timeout 1m; proxy_read_timeout 1m; -
申请 SSL 证书。
Gotify 系统配置
-
修改密码
- 顶部菜单:
USERS> 点击“编辑”图标 > 输入新密码 > 保存。
- 顶部菜单:
-
获取 Token
- 顶部菜单:
APPS>CREATE APPLICATION> 输入名称 > 创建。 - 创建后,点击列表中 Token 的“眼睛”图标,获取 Token 字符串,例如:
CflcRp-PoIUY0HI。
- 顶部菜单:
测试
使用以下命令发送测试消息:
curl -X POST "https://你的网址/message?token=你的token" \
-H "Content-Type: multipart/form-data" \
-F "title=标题" \
-F "message=消息内容" \
-F "priority=5"
n8n 通知配置
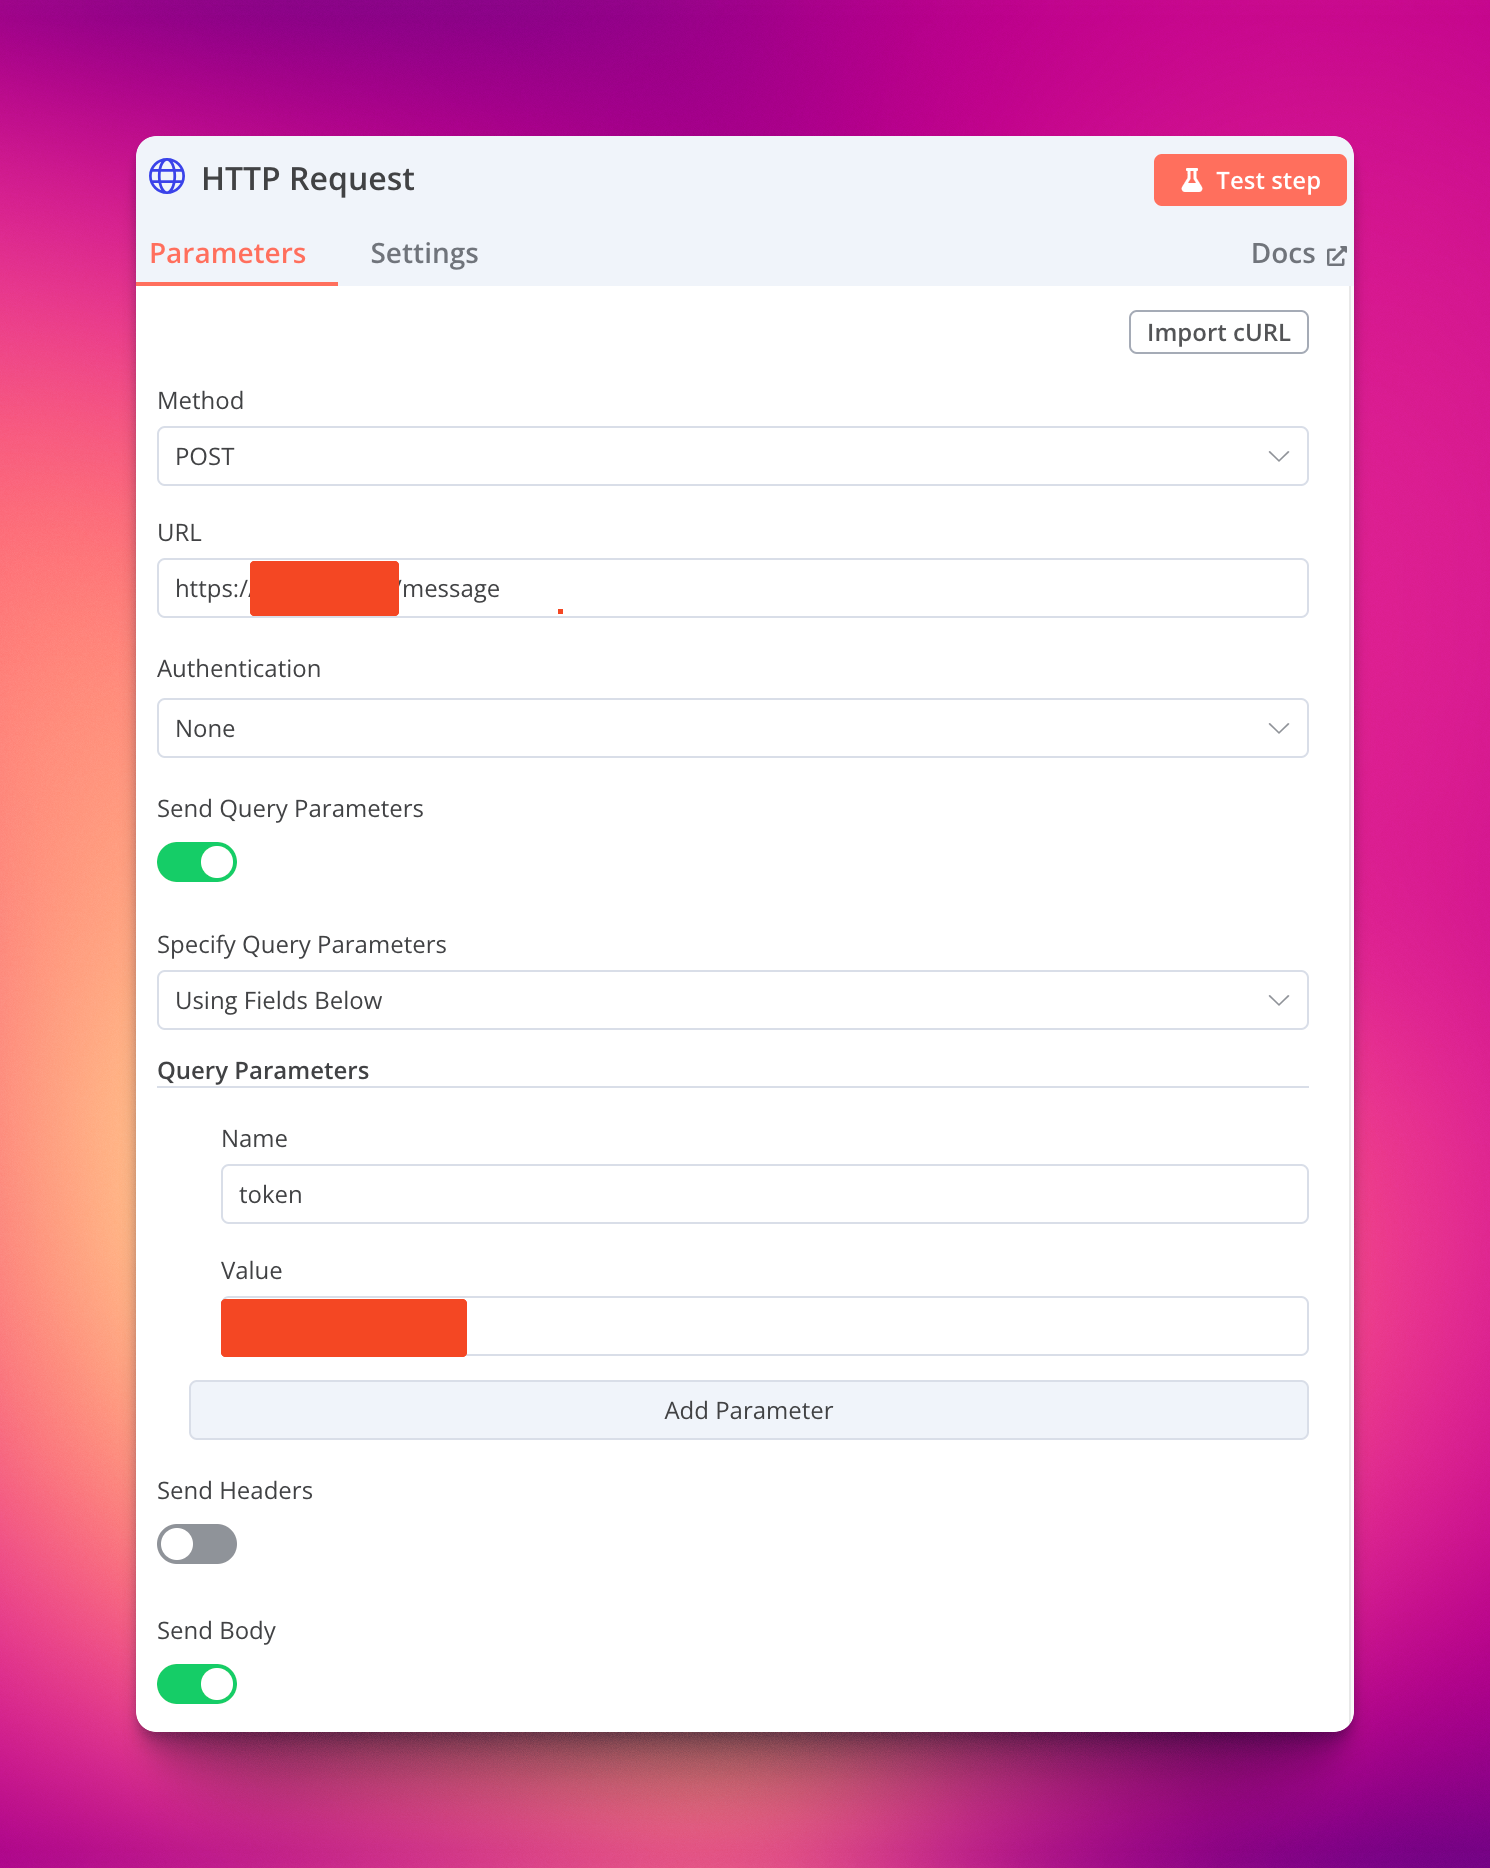
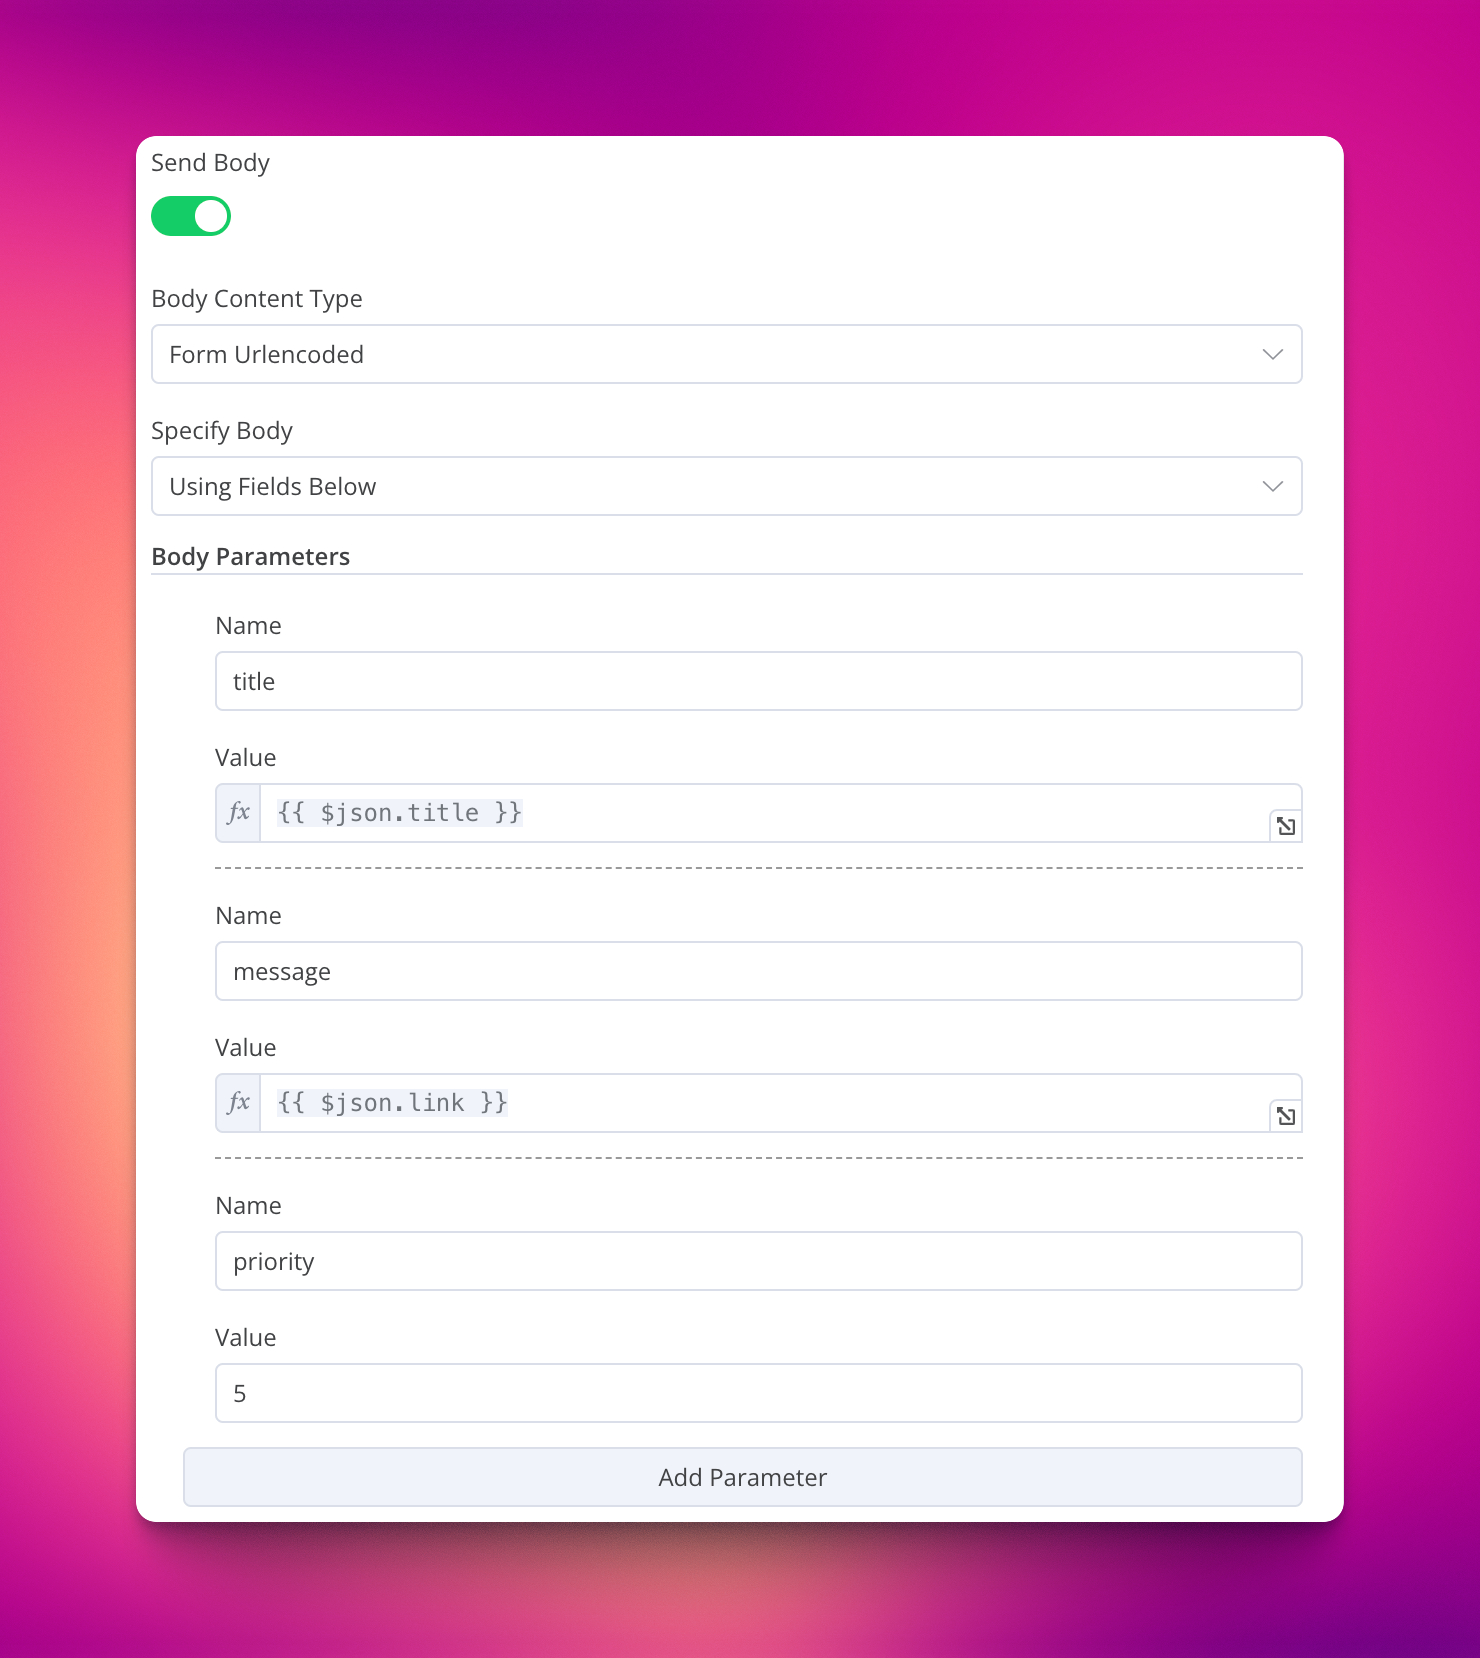
在 HTTP Request 配置中设置如下:


通过以上步骤,你可以成功搭建和配置 Gotify 推送服务。

0